
Artintech ERP’s Inspection module covers incoming, in-process, and final inspection in one place. The flow is: define reusable Inspection Types (what to check and how), generate Inspection Reports against them (lot-by-lot results with automatic pass/fail), and raise Requests for Deviation when material doesn’t meet spec. Inspection Templates bundle common inspection setups you reuse across items.
1. Open the Inspection module #
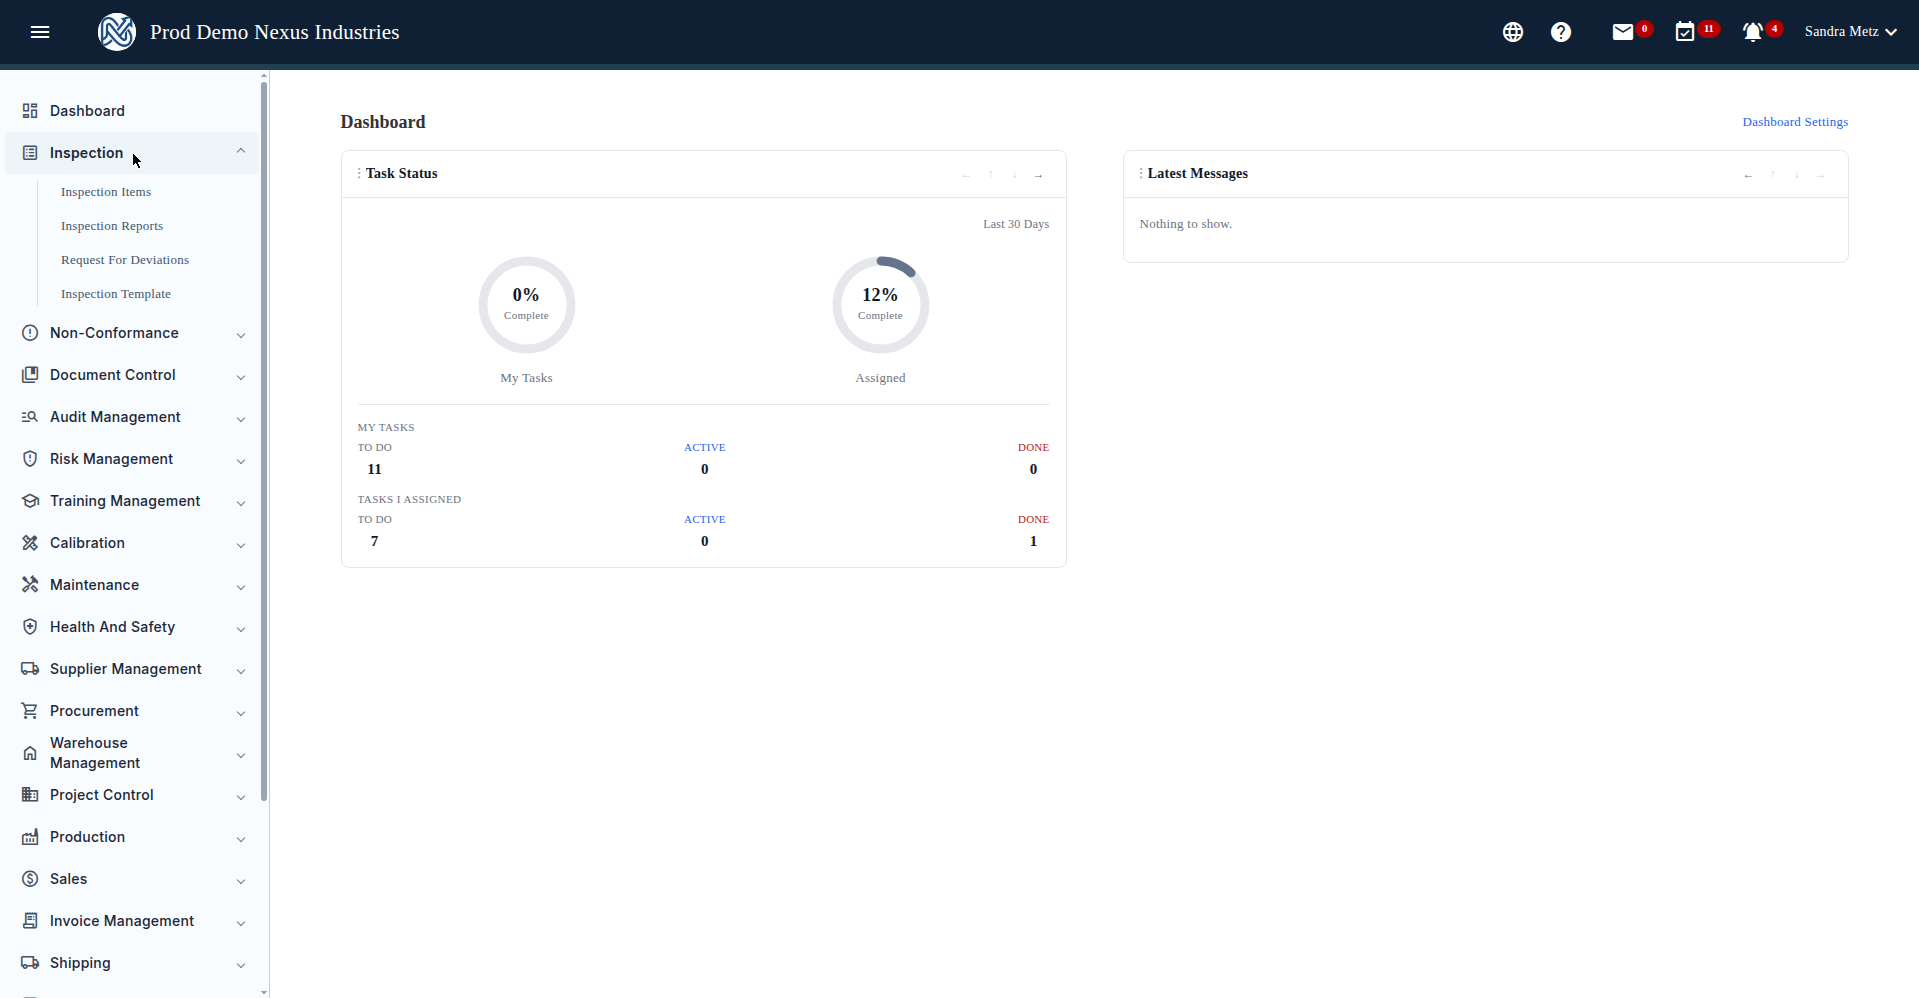
From the left sidebar, open Inspection. You’ll see its four sections: Inspection Items, Inspection Reports, Request For Deviations, and Inspection Template. (Note: this module has no Settings pages, inspection types live inside each item’s Detail page.)
2. Review the Inspection Items list #
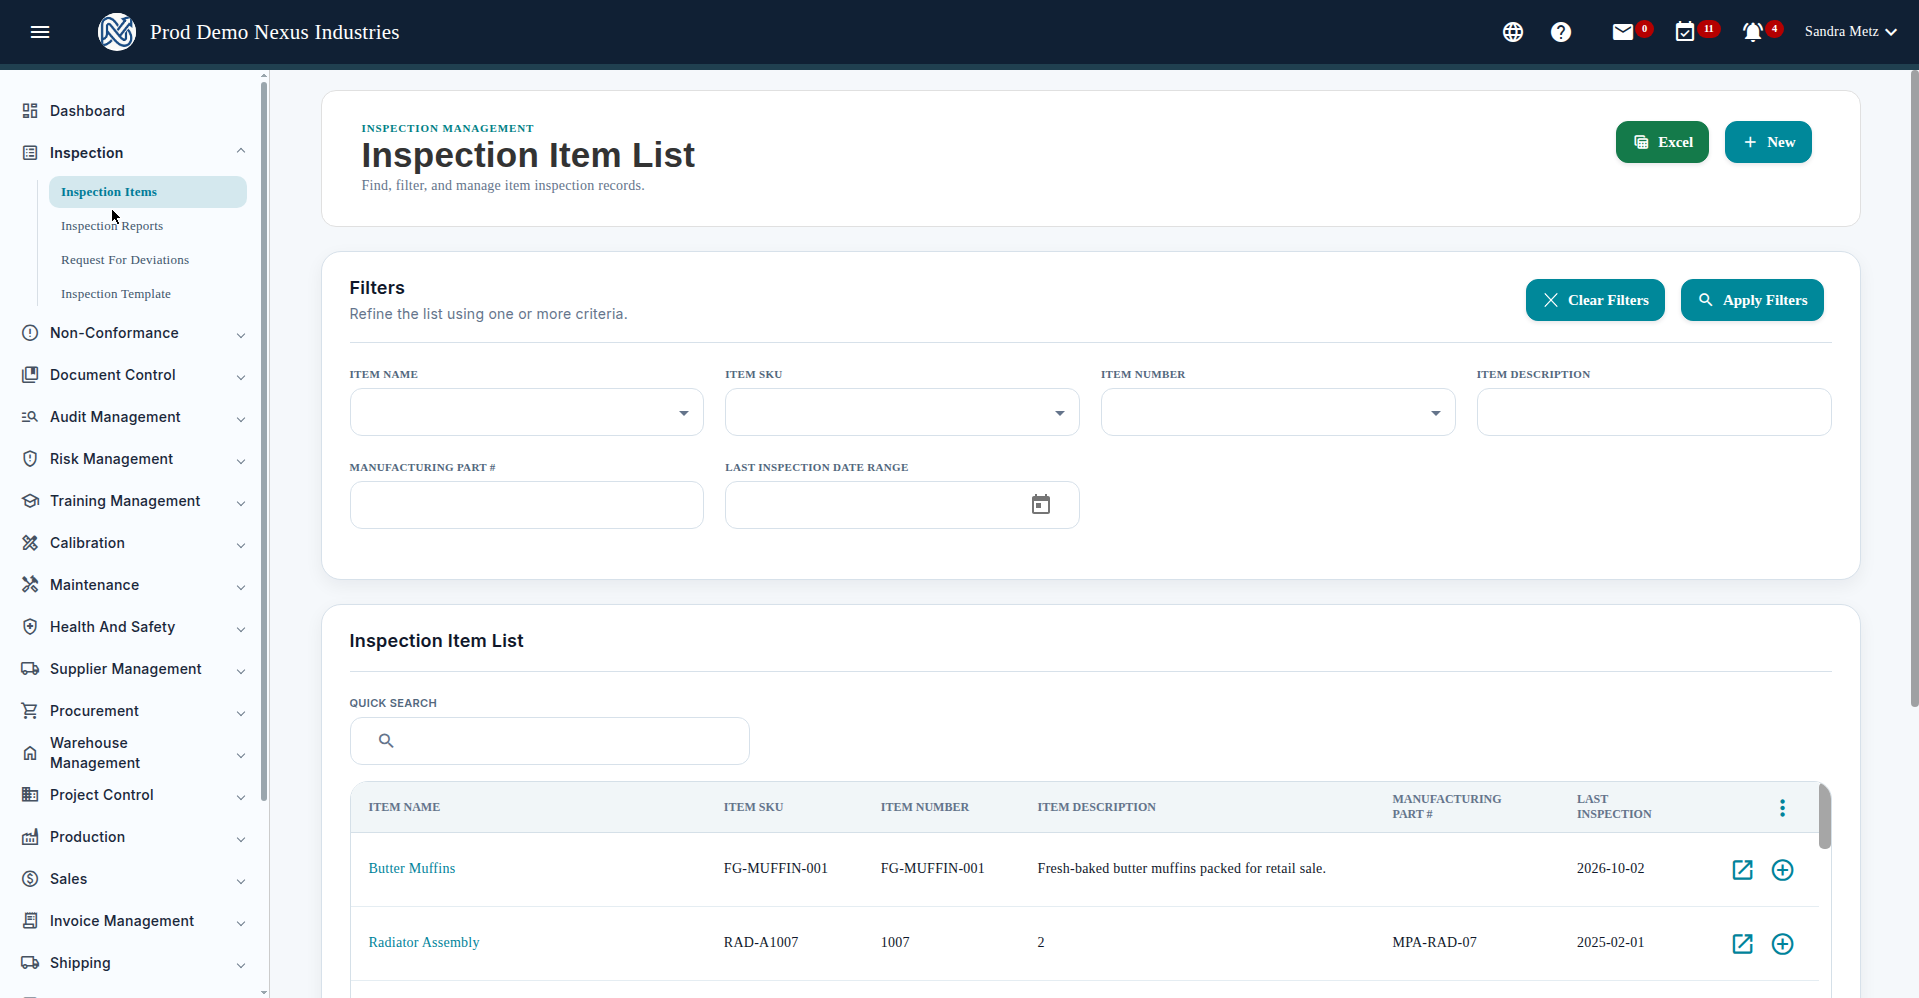
Inspection Items lists every item that has inspection configured. The list has the familiar Artintech pattern: quick search, a filter panel with Apply / Clear, sortable columns, pagination, and an Excel export button. Each row has Detail (manage the item’s inspection types and report history) and New Report (start an inspection report for that item).
3. Define an inspection plan (inspection type) #
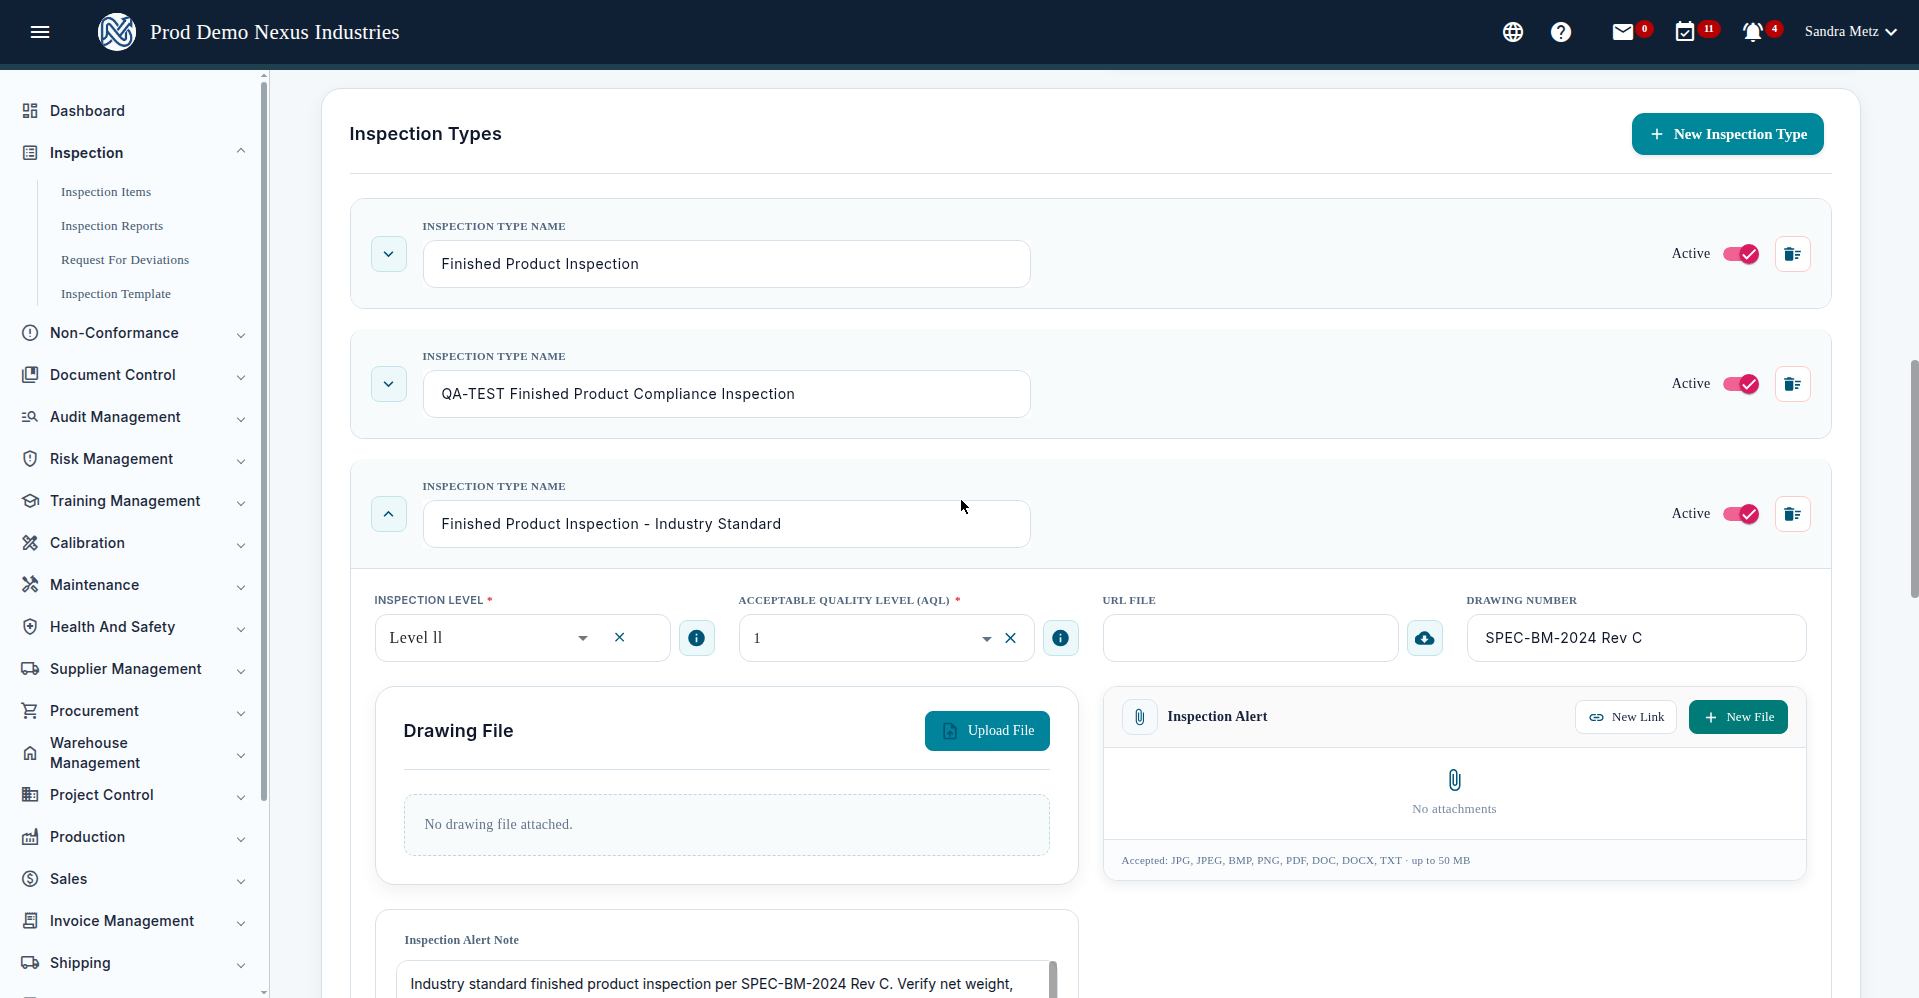
An inspection type is the plan: which parameters to measure, the tolerance limits, the sampling level, and the AQL.
- On the Items list, click Detail on the item, for example, Butter Muffins (FG-MUFFIN-001).
- In the Inspection Detail form, add an inspection type such as Finished Product Inspection – Industry Standard.
- Fill in the plan:
- Inspection Level (e.g. Level II) and AQL (e.g. 1.0), these drive the sampling plan the system recommends.
- Drawing No. / Revision (e.g. SPEC-BM-2024 Rev C).
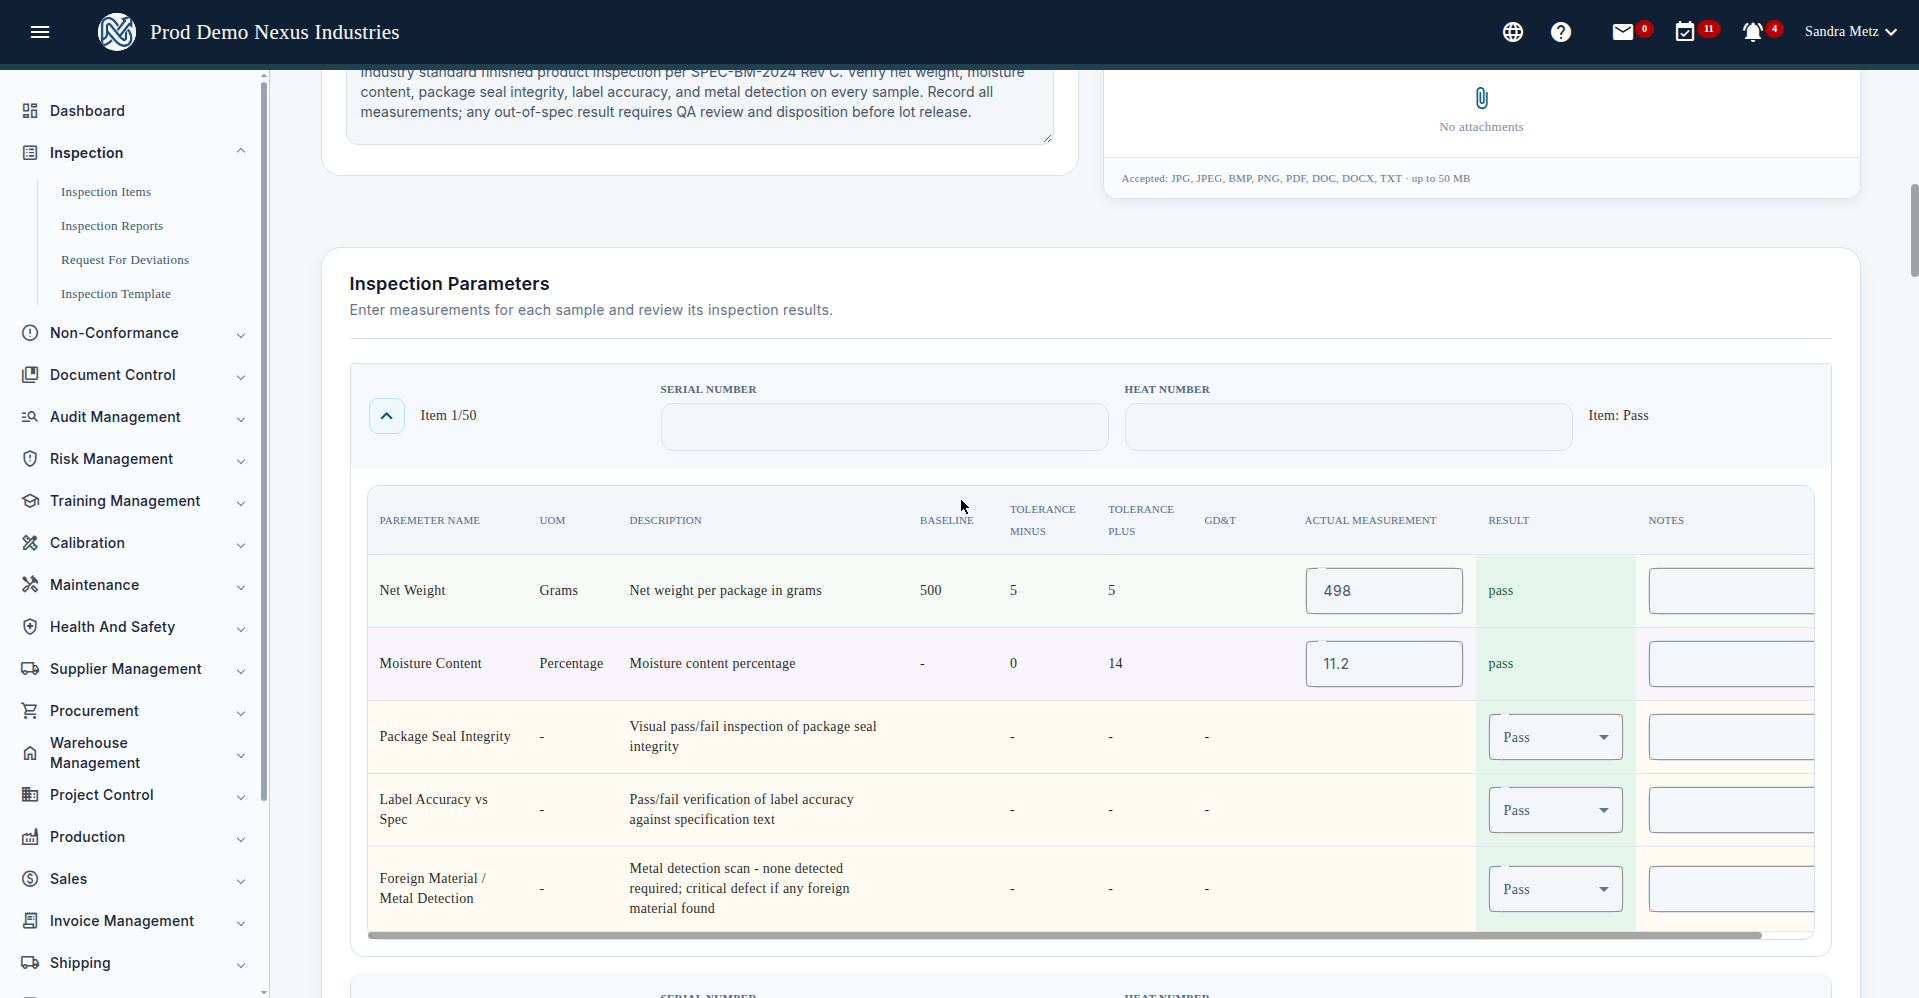
- Parameters with tolerance limits, e.g. net weight, moisture content, seal integrity, label accuracy, metal detection.
- Click Save. Required fields are validated with inline “Field Has An Error” messages, and if you try to leave with unsaved changes you’ll get a “Warning / Want to Save Changes?” prompt, click Yes to keep your work.
Note: inspection types are edited and deleted from this same form. Deleting stages the removal, you must click Save afterward for it to take effect.
4. Generate an inspection report #
Reports are lot-by-lot records of what was actually measured. They’re created from the item, not from the Reports page.
- On the Items list, click New Report on the item (Butter Muffins).
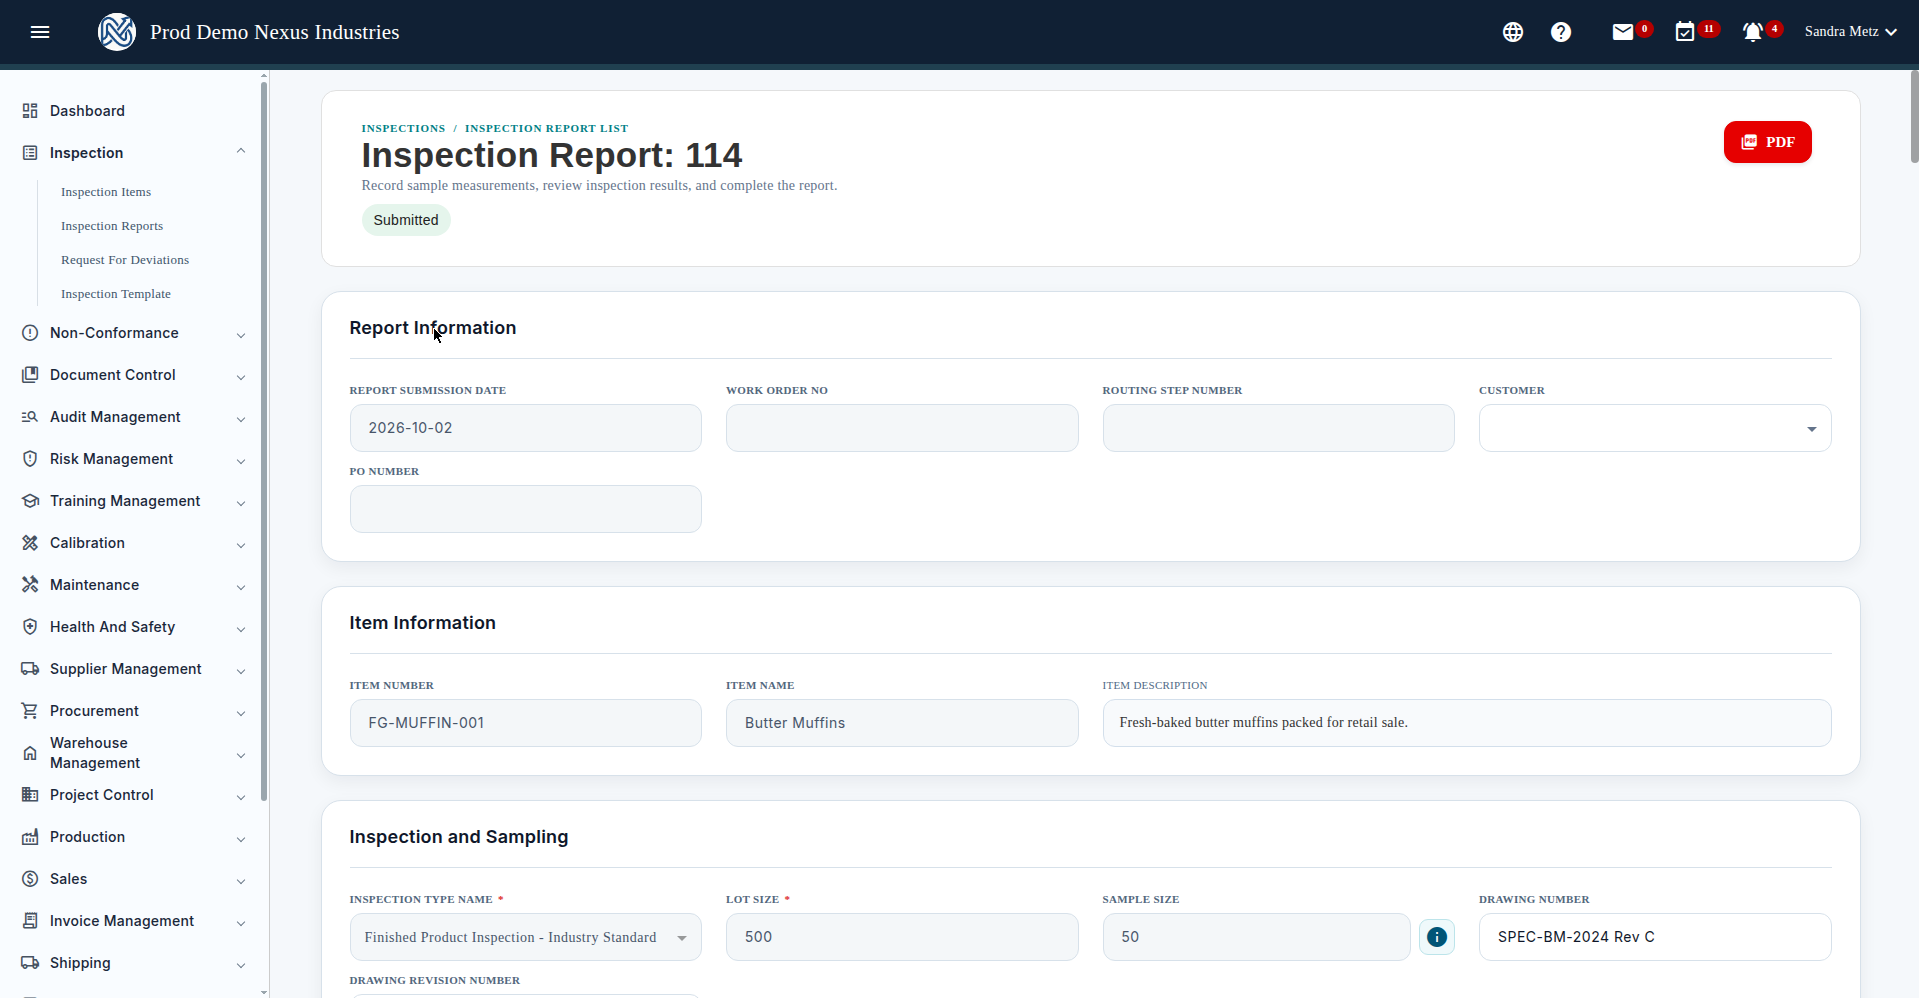
- Fill in the required fields: Inspection Type Name and Lot Size. The Save Draft button stays disabled until both are filled.
- When you select the inspection type, the system warns: “The following Inspection parameters will be added from the Inspection Type. Do you want to continue?”, click Yes.
- Click Generate Report. The system recommends the sample size from your Level and AQL, for example, a lot of 500 at Level II / AQL 1.0 recommends 50 samples.
- Record measurements in the sample grid. The system evaluates each measurement against its tolerance automatically and marks it pass or fail.
- When all samples are recorded, submit the report. The report moves from Draft to Submitted and becomes read-only.
Example: Report #114, Butter Muffins (FG-MUFFIN-001), lot of 500, 50 samples / 250 measurements, all passing. Verified in the Reports list as Submitted / Accept.
Tip: every inspection report you’ve ever run on an item is listed in the Inspection Report History grid on the item’s Detail page, handy for trend-spotting. (Reports can’t be deleted; a mistaken report can be Voided instead, which locks it as Void.)
5. Raise a deviation request (RFD) #
When material doesn’t meet spec and you need an authorized exception, raise a Request For Deviation.
- Go to Inspection → Request For Deviations and click New.
- Pick the item, the item selector cascades Item Number and SKU automatically.
- Fill in the required fields: Drawing No. / Revision, Lot Size, Sample Size, Deviation Qty, Serial Numbers, WO/Job Number, and Customer.
- Click Save Draft (status: Draft), then Submit, confirm with “Submit Request For Deviation” → Yes. The RFD becomes Submitted and read-only.
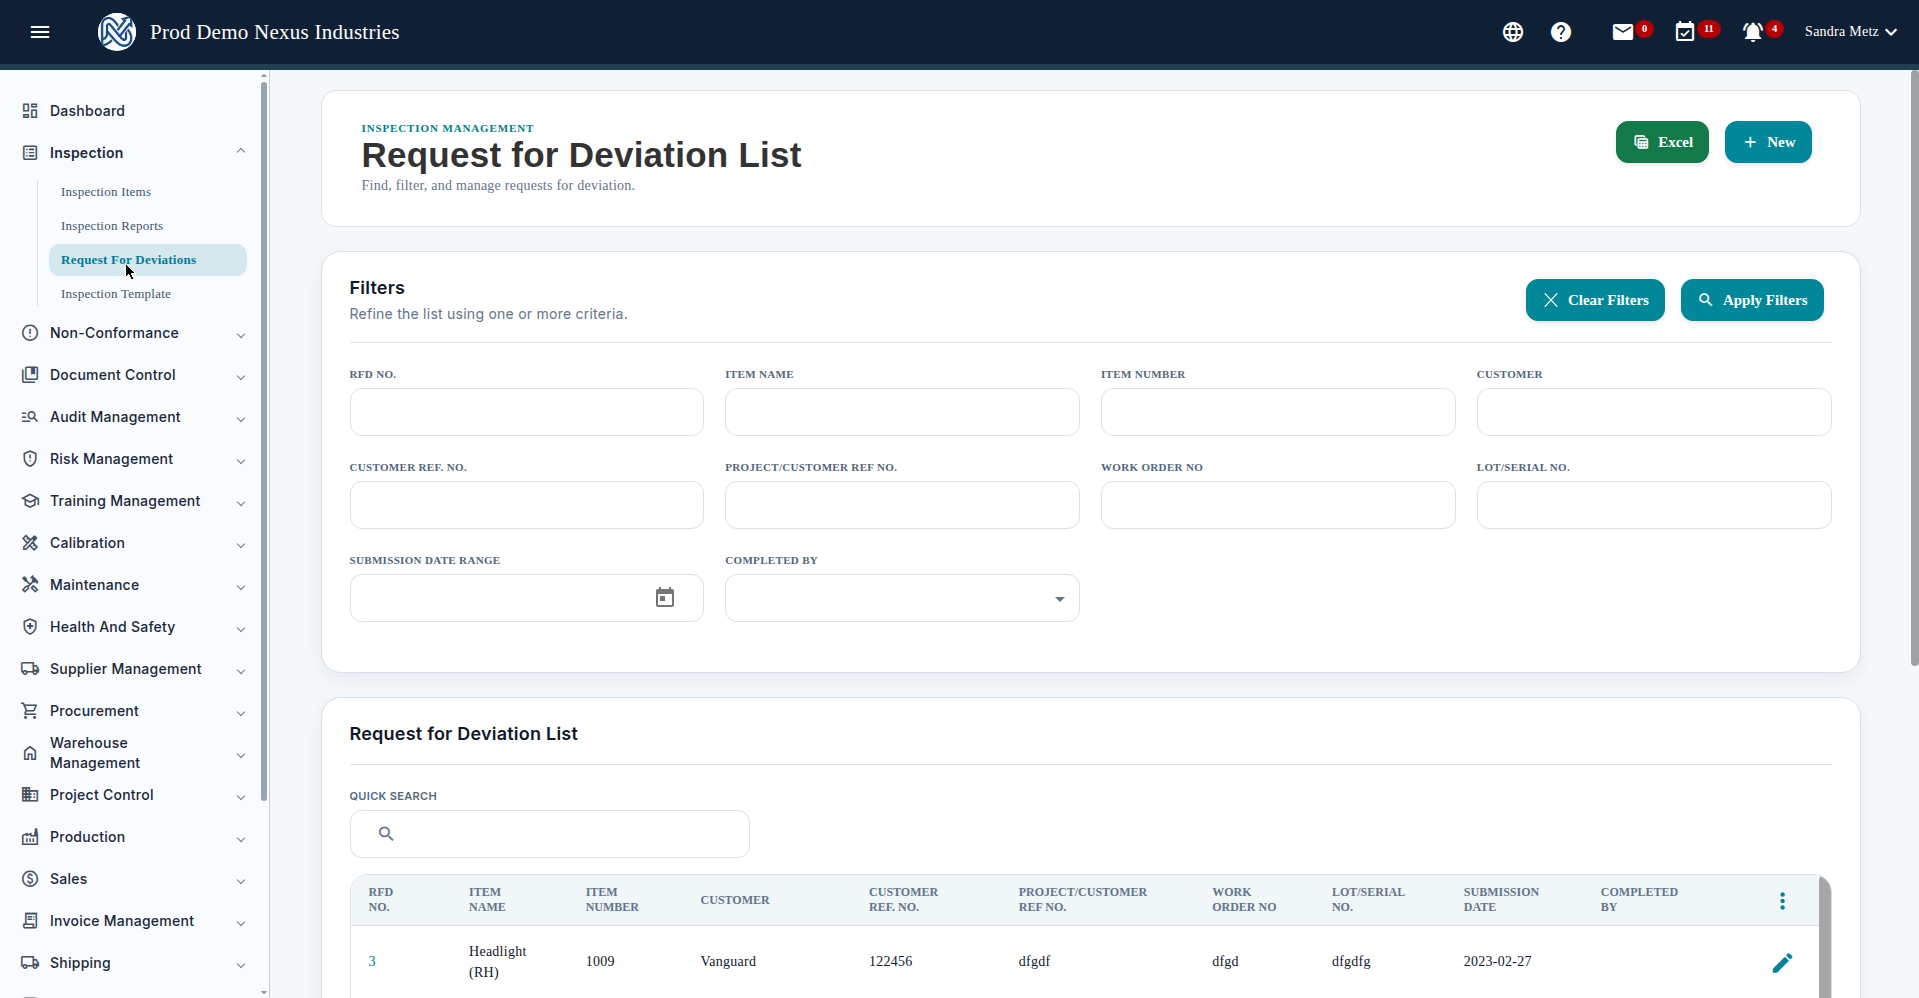
The RFD list supports quick search, filters, sorting, and Excel export. Note there’s no status column on the list, so Draft and Submitted requests look identical until you open them.
6. Reuse inspection templates #
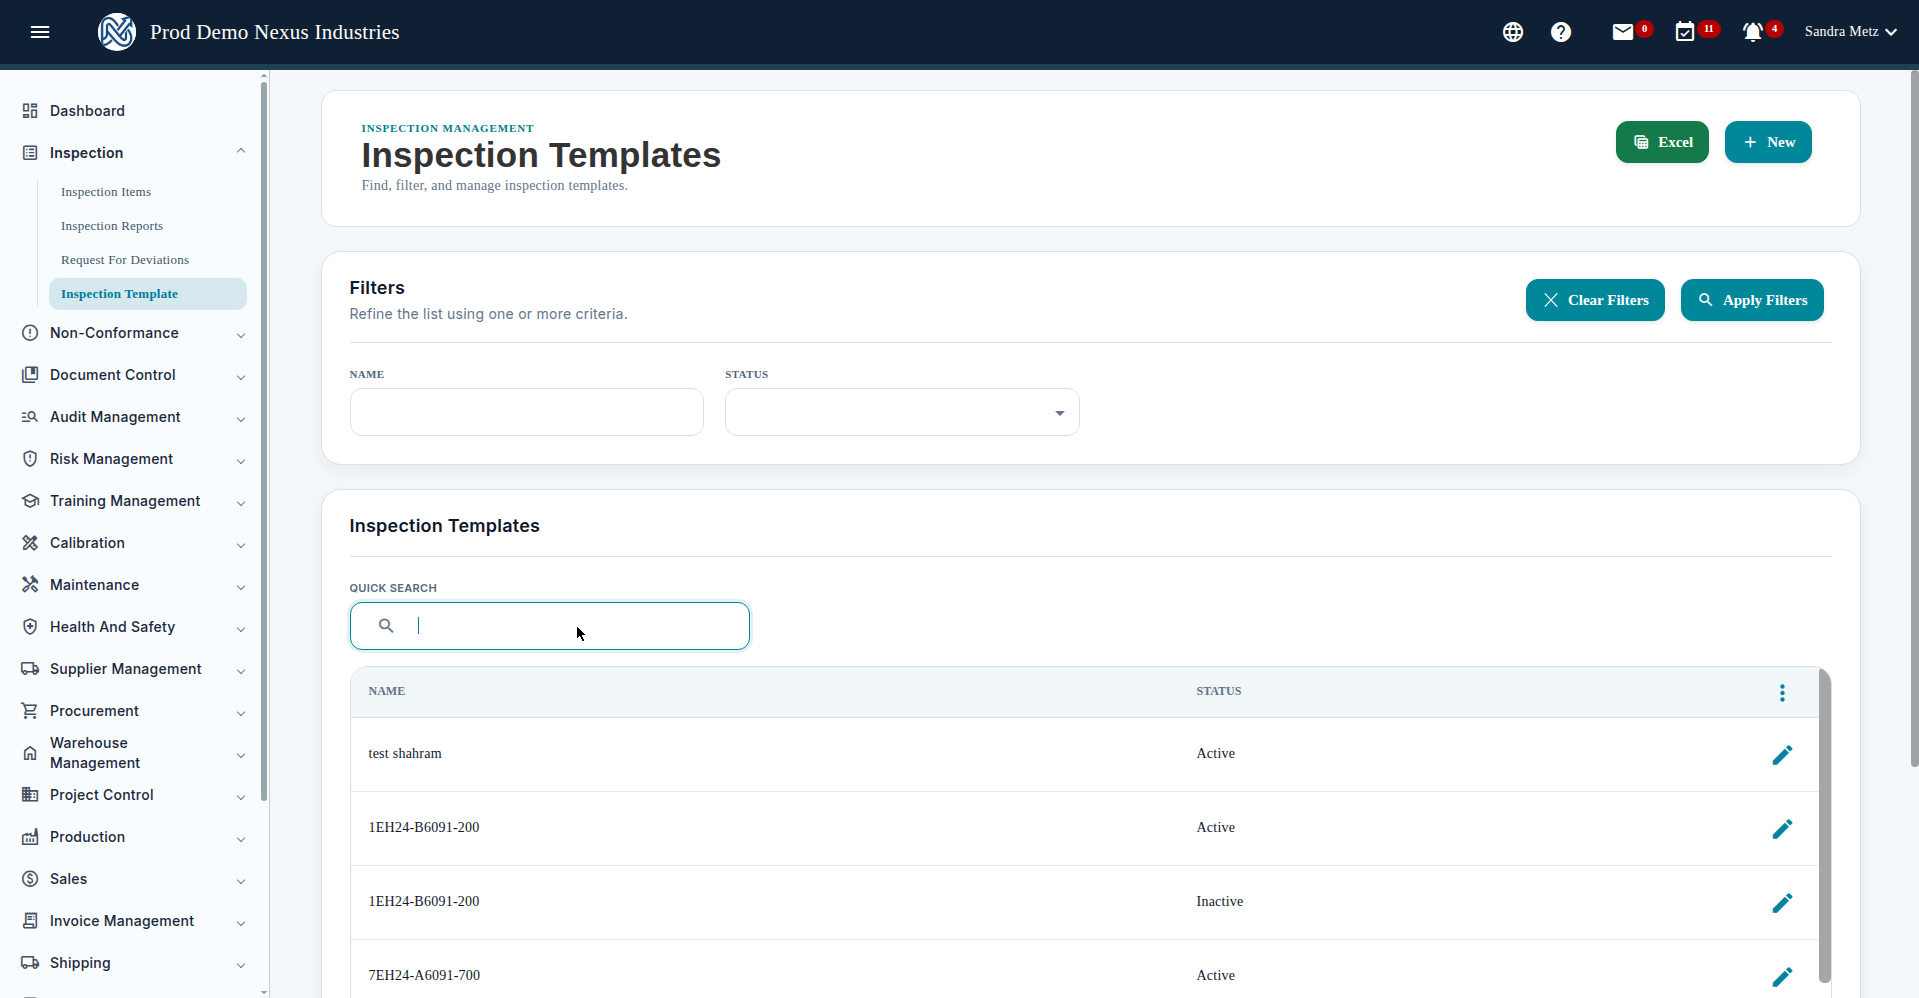
Inspection Templates bundle ready-made inspection setups you apply to items instead of defining parameters from scratch. For example, a food plant might keep templates for GMP facility checks, HACCP compliance, and incoming raw material inspection. Create one via New on the Template list: name it, add attributes, and Save. To find a template in a long list, use the quick search by name.
Next: failed or marginal results usually start life as a Snag, see the Non-Conformance & CAPA tutorial to take a defect from report to corrective action.


