
Artintech ERP’s Calibration module keeps every measuring instrument under control: define the gauge types with their ranges and tolerances, register each gauge, and track its calibration schedule with full history. This tutorial walks you through the full flow using realistic food-manufacturing examples.
1. Open the Calibration module #
From the left sidebar, open Calibration. You’ll see its sections: Gauge Types and Gauge List.
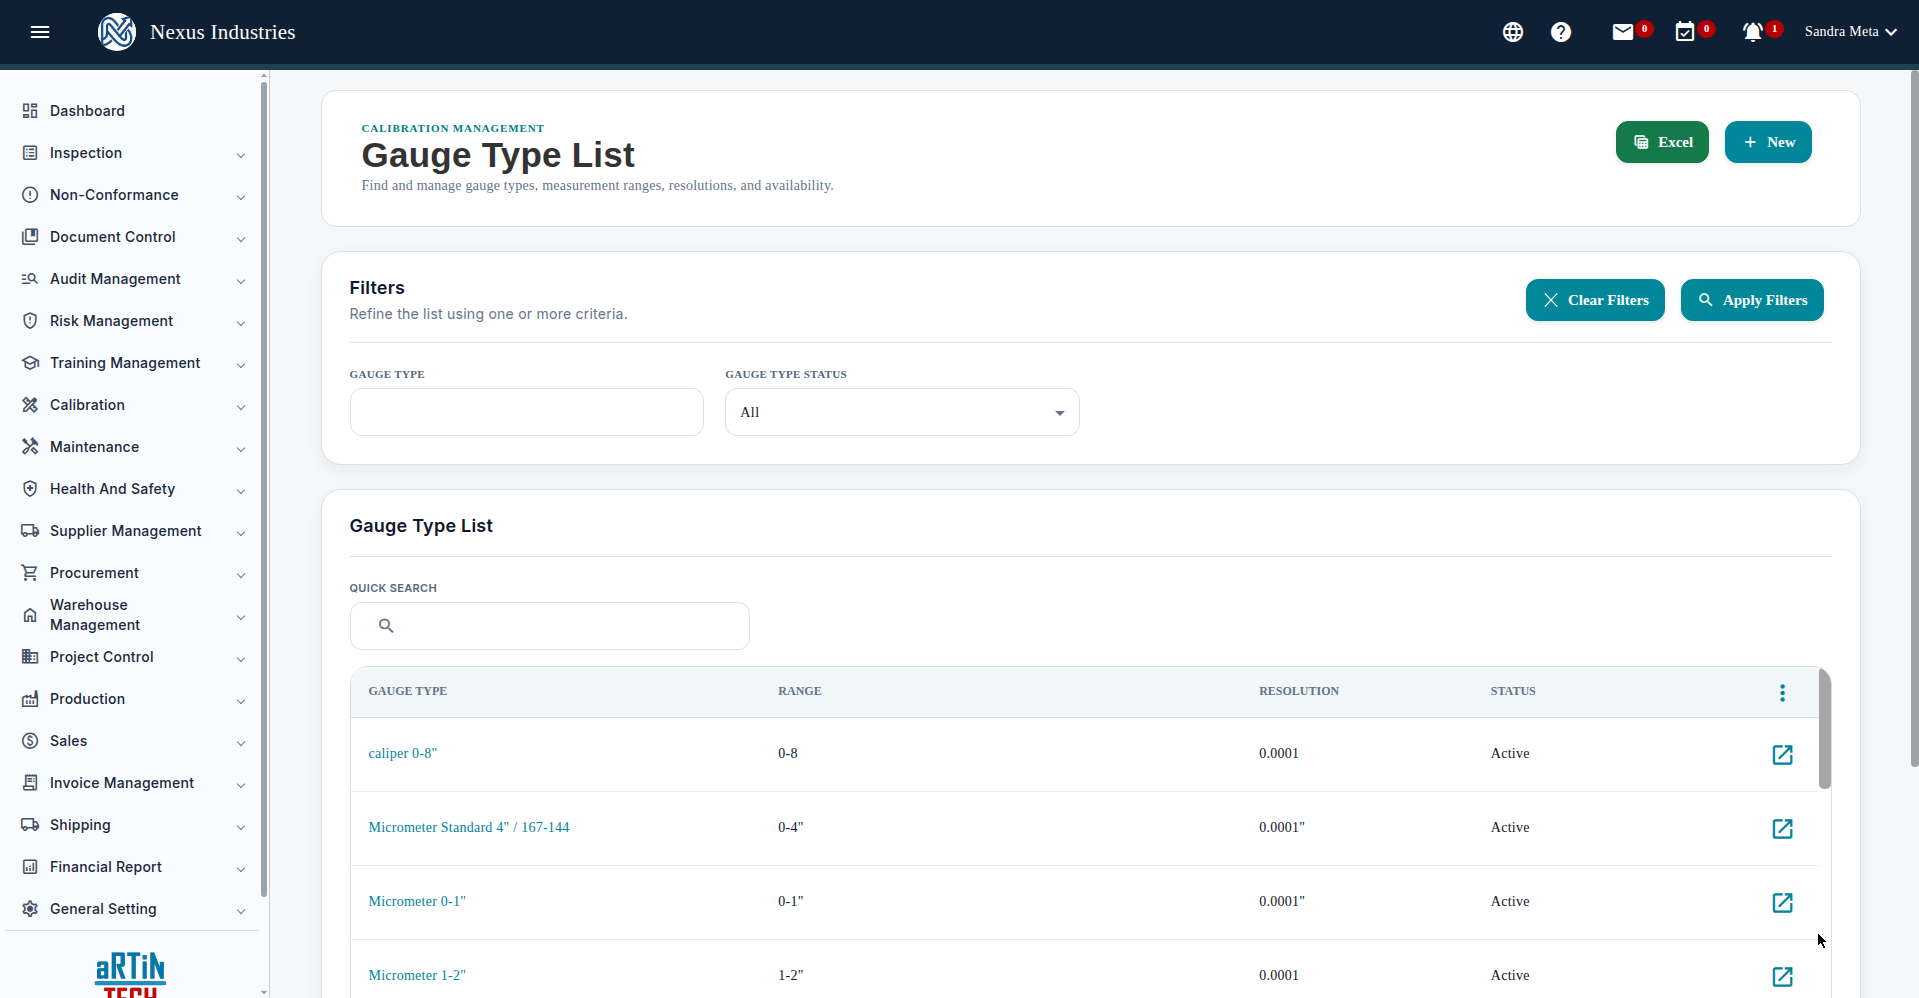
2. Define gauge types #
Gauge types describe the instrument family: its measuring range, resolution, unit, calibration instruction, and parameter tolerances.
- Go to Calibration → Gauge Types and click New.
- Fill in: Gauge Type (required) — e.g. “Metal Detector”; Measuring Range (required) — e.g. “Fe 1.5 / Non-Fe 2.0 / SS 2.5 mm”; Resolution (required); Unit (required); Calibration Instruction; and the Parameters table (parameter name, measuring size, tolerances −/+).
- Save, and make sure the type is Active — new types can save as Inactive even with the switch on, so check the list.
Example types: Metal Detector, Thermometer (−50 to 300 °C, 0.1 °C), Scale (0 to 150 kg, 0.01 kg), pH Meter (0 to 14 pH, 0.01 pH). The list supports filters, quick search, sorting, and Excel export.
3. Register a gauge #
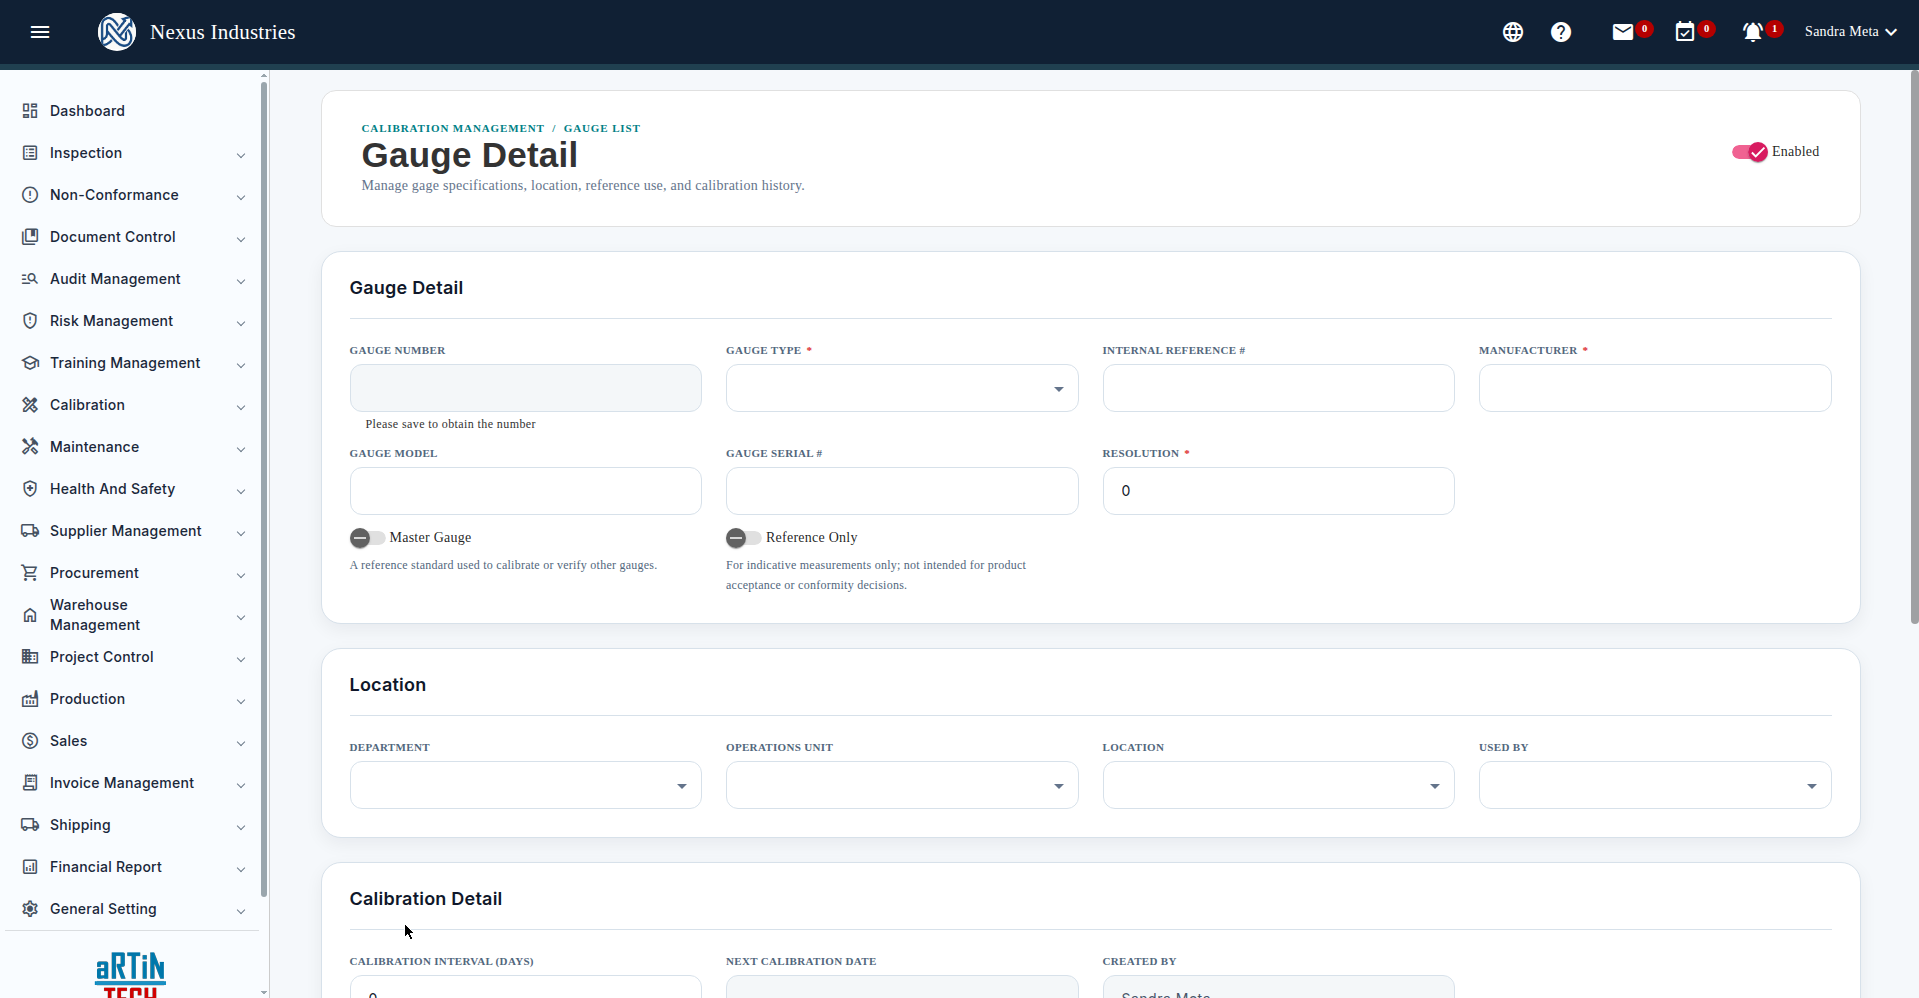
- Go to Calibration → Gauge List and click New.
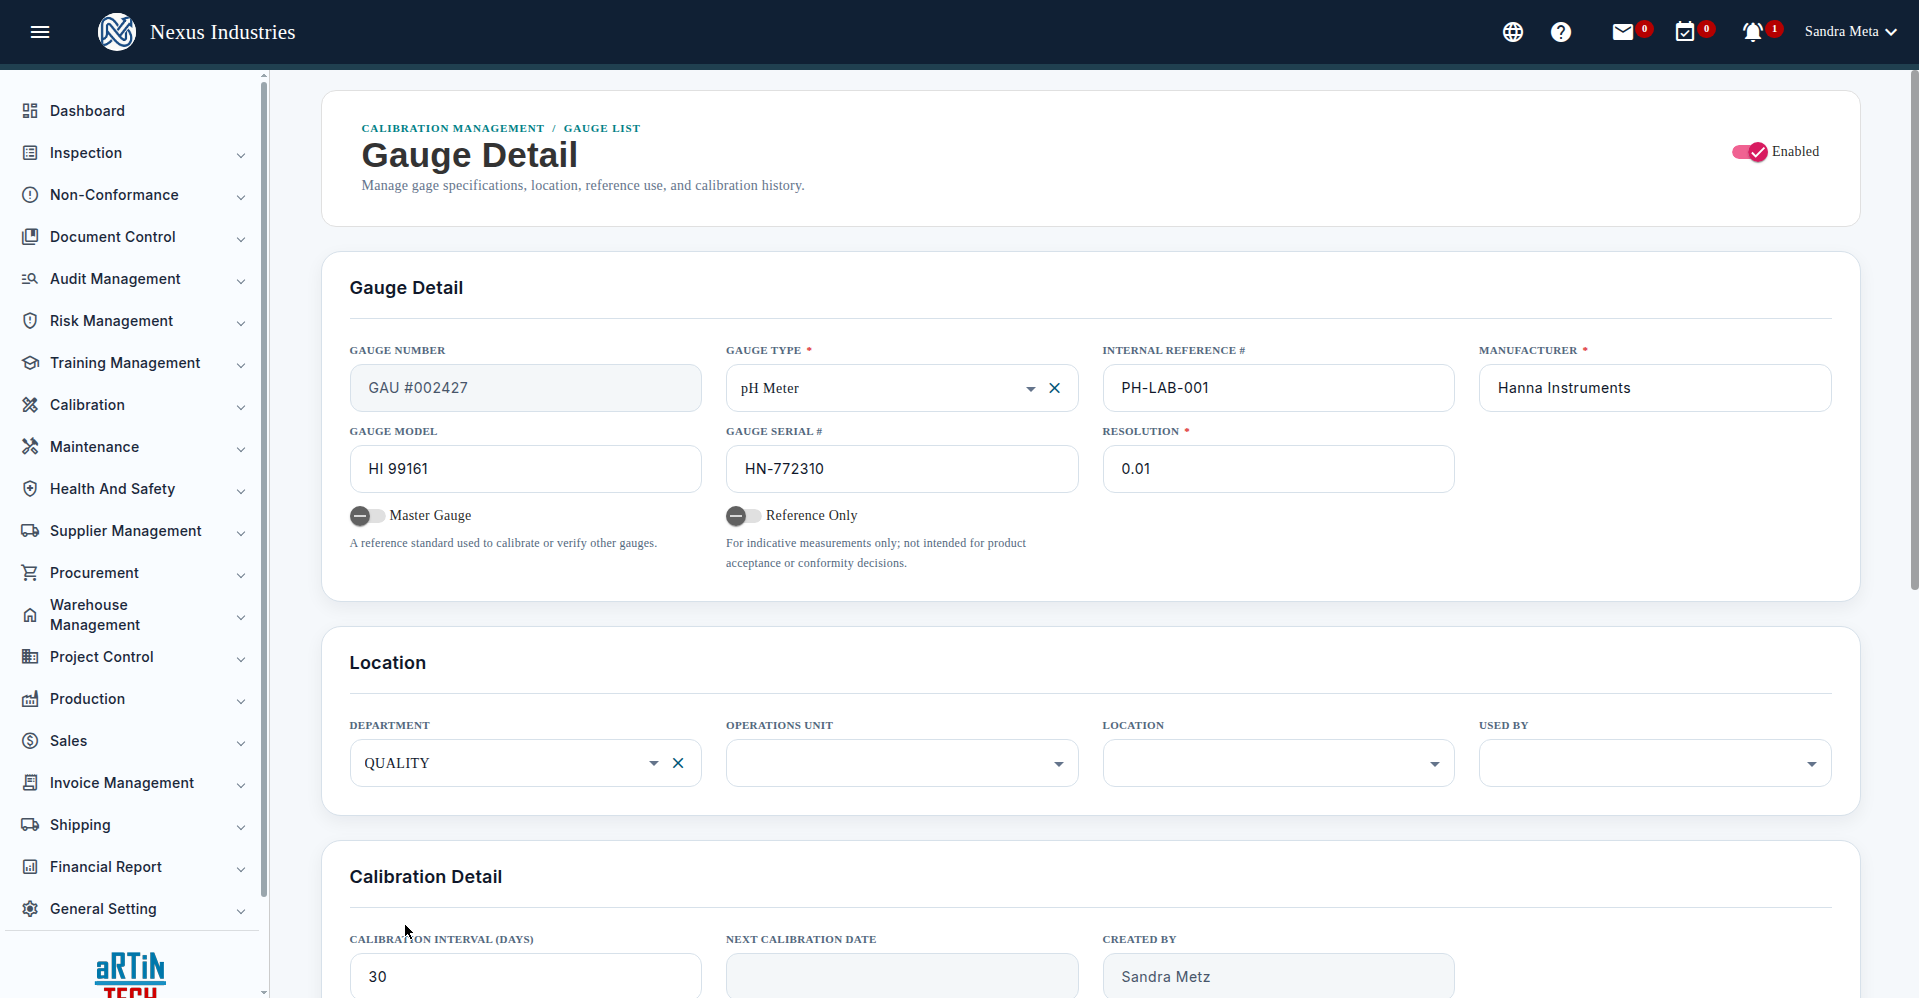
- Fill in: Gauge Type (required, only Active types are listed) and Resolution (required, inherits from the type); Internal Reference # — e.g. “PH-LAB-001”; Manufacturer (required) — e.g. “Hanna Instruments”; Gauge Model — e.g. “HI 99161”; Gauge Serial # — e.g. “HN-772310”; Location — department, operations unit, location, used by; Calibration Interval (Days) — e.g. 30 for monthly, 90 for quarterly; Master Gauge / Reference Only switches as applicable.
- Save. The Gauge Number is assigned automatically on save (e.g. “GAU #002427”).
4. View gauge detail and calibration history #
The Gauge Detail shows everything: specifications, location, calibration interval, notes, and the Calibration History table — every calibration with its number, date, status, phase, who performed it, and a PDF certificate icon. Click Create New Calibration to record the next calibration event.
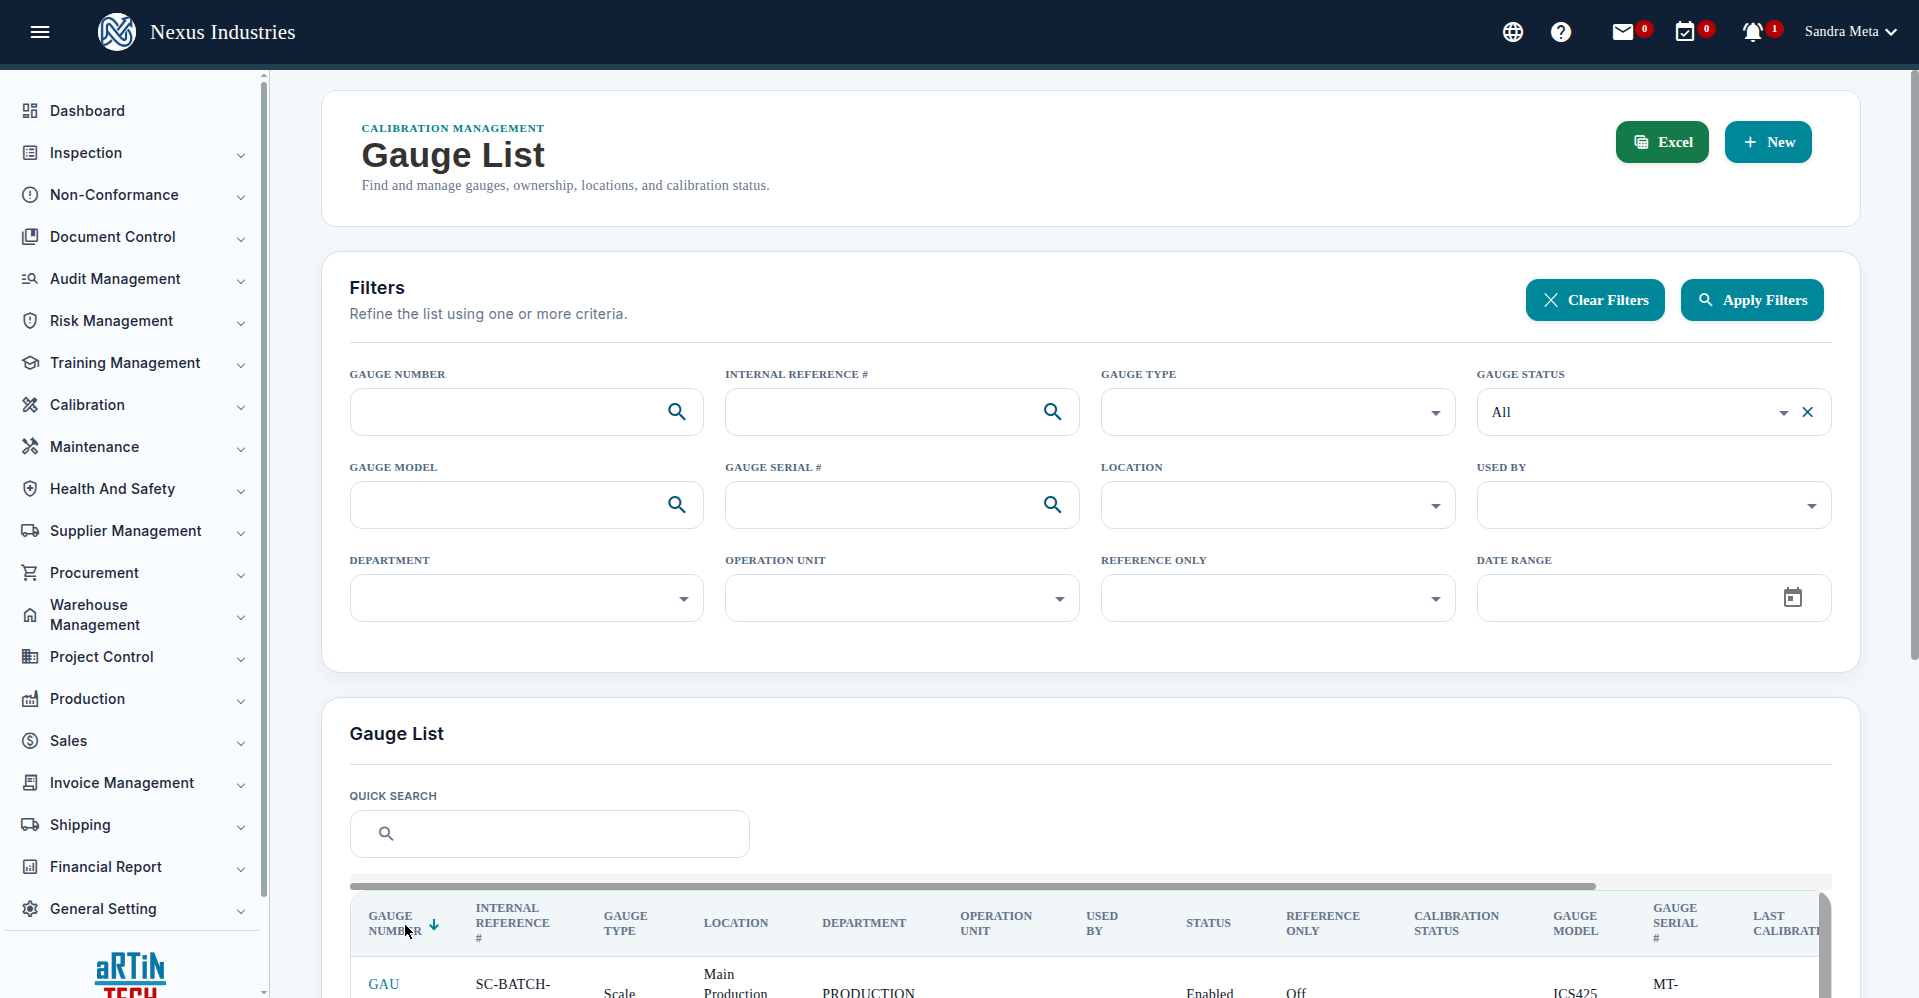
5. Track the calibration schedule #
The Gauge List shows each gauge’s Last Calibration and Next Calibration dates with filters by gauge number, type, status, model, serial, location, department, and date range — plus quick search, sorting, and Excel export. Sort or filter by Next Calibration to see what’s due.
6. The full flow at a glance #
Define the gauge type (range, resolution, tolerances) → Register the gauge (model, serial, location, interval) → Calibrate on schedule (record each event with its certificate) → Track history per gauge. Every gauge keeps its complete calibration history, so you’re always audit-ready.


