In this training guide, we will walk you through the process of creating a new safety inspection using the Artintech ERP system. This guide is based on a step-by-step video tutorial, ensuring you have all the information you need to effectively use this feature. Whether you’re conducting a fire safety inspection or any other type of safety check, this guide will help you set up your inspection details accurately and efficiently. Let’s dive in and learn how to enhance workplace safety with Artintech ERP
Access the Dashboard: Start by navigating to the dashboard of the Artintech ERP system.
Navigate to Health and Safety: Scroll down to the health and safety section on the dashboard.
Go to Inspection List: Click on the ‘Inspection List’ option under the health and safety section.
Create New Inspection: Click on ‘New’ to start creating a new safety inspection.
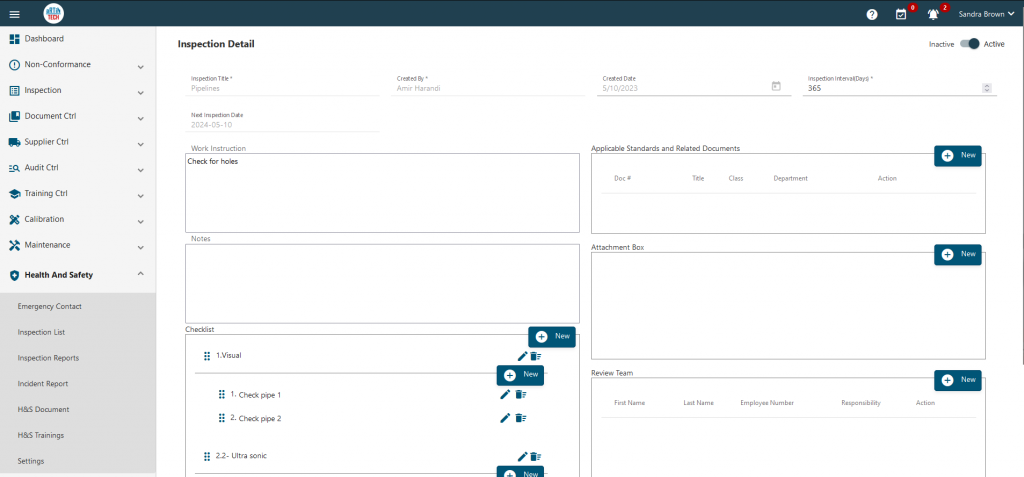
Enter Inspection Title: Enter the title of the inspection. For example, you can name it ‘Fire Safety Inspection’.
Set Inspection Interval: Set the inspection interval as per your requirement. In this case, we set it to 30 days.
Add Work Instructions: Enter the work instructions for the inspection.
Add Notes: Add any notes related to the inspection.
Create a Checklist: Click on ‘New’ to create a checklist for the inspection. You can add as many items as needed.
Add Applicable Standards and Related Documents: Click on ‘New’ under the ‘Applicable Standards and Related Documents’ section. Add all the relevant standards and documents.
Attach Files: If you have any pictures or other attachments, you can add them in the ‘Attachment’ section.
Add Review Team: Finally, add the members of your review team.
Save Inspection Details: Once all the details are filled in, click on ‘Save’ to save the inspection details.
This is how you create a safety inspection using the Artintech ERP system. For more details, you can refer to the video tutorial.


